
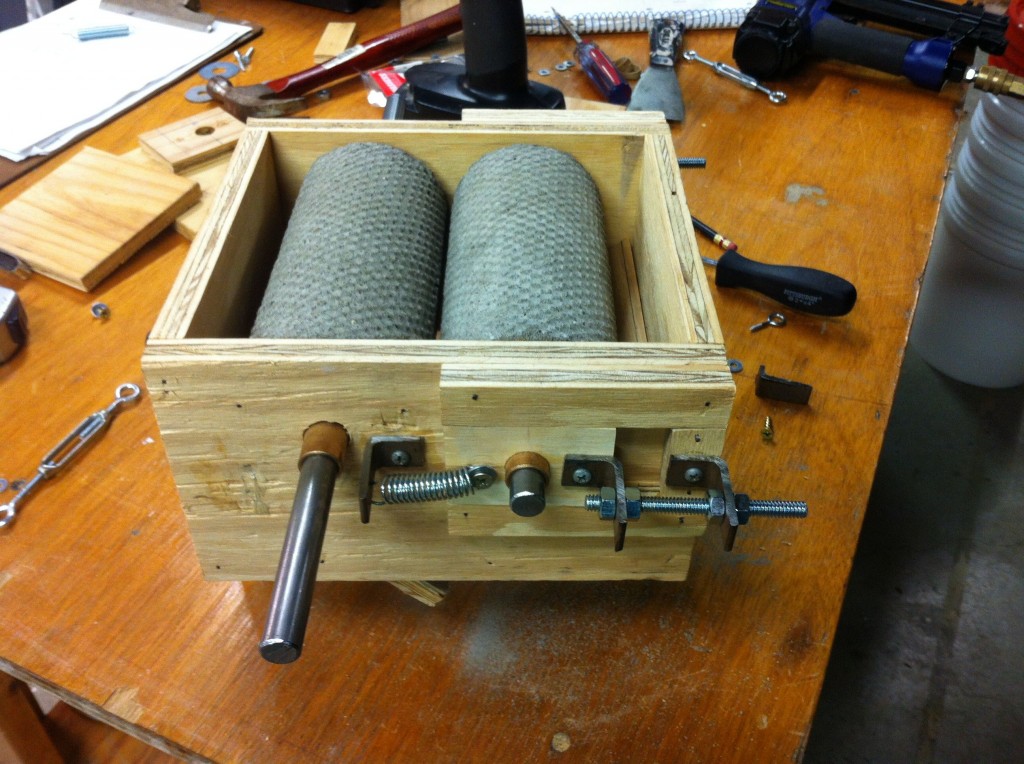
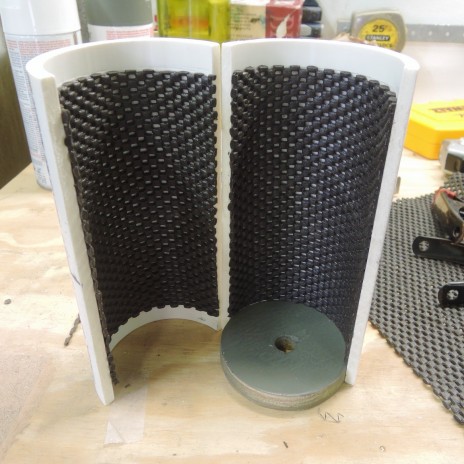
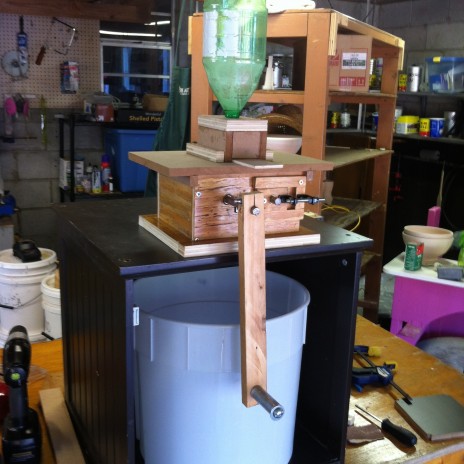
Grain Mill with concrete rollers
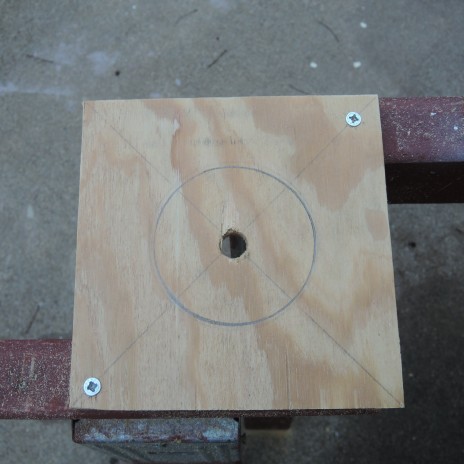
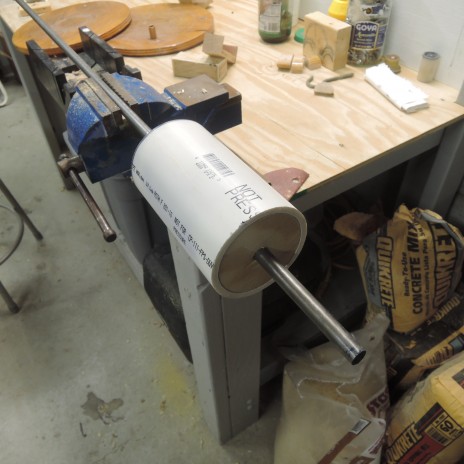
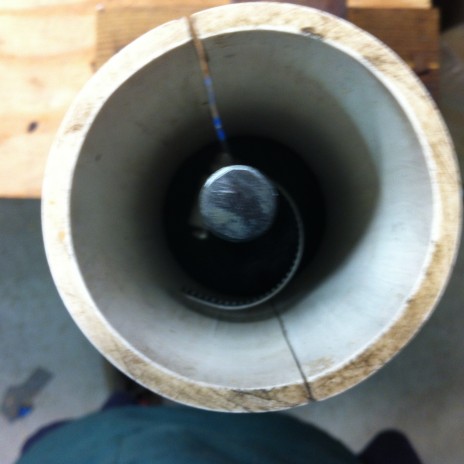
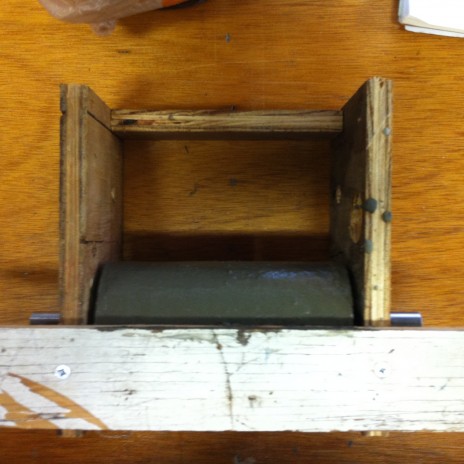
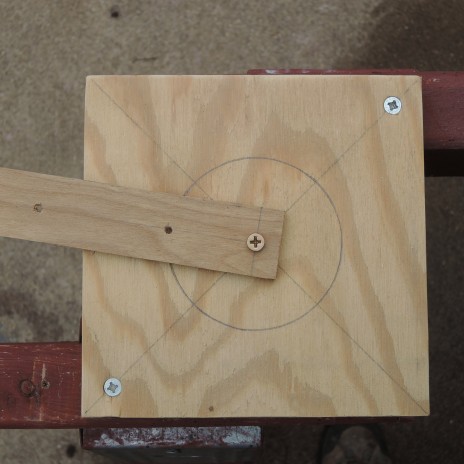 Scribing the ID of the PVC form.

The mill in action, I was filming and cranking the handle at the same time…
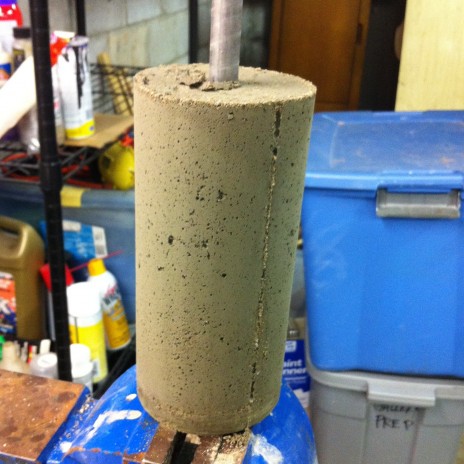
I have wanted to make a grain mill to mill my own grains for homebrewing for years, so I finally set out to make one. I have recently moved to an area that is void of scrap yards… Apparently, it is a city wide ordinance.. So I didn’t have any access to steel pipe or scrap bearings so I decided to make my rollers by casting them in concrete. I think in the near future I’ll throw some and fill around the shafts with concrete but for now these work great. I wanted to be able to adjust the gap so I have the ability to fix any issues with the grind, or in the case of beer making it’s more referred to as a “crush”. The case is simply 1/2” plywood, the hardware I used to mount the rollers is all parts out of my studio. I did fabricate the adjustment mounts out of an old metal bed frame but these too could have been “L” brackets. I don’t have a tap set or I would have really liked to have the bolts threaded so you could simply turn the bolt with a 7/16” wrench to adjust the gap, but this works just fine. I epoxied 1/2” oil impregnated bushings into the 1/2” plywood sides, I opted out of using flange bearings due to the cost, plus I am not expecting to run this mill often enough to warrant them. The shaft material is 1/2” steel from the Orange Place.
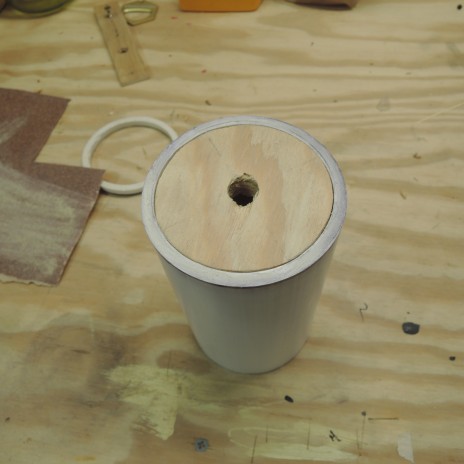
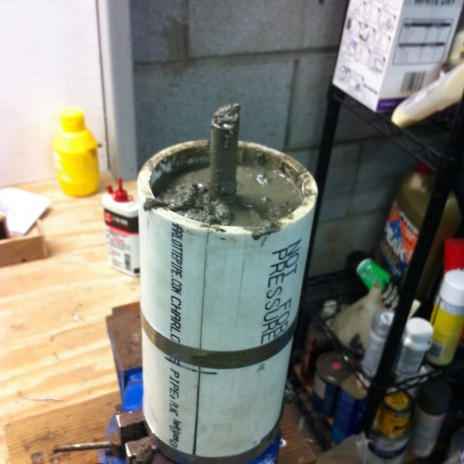
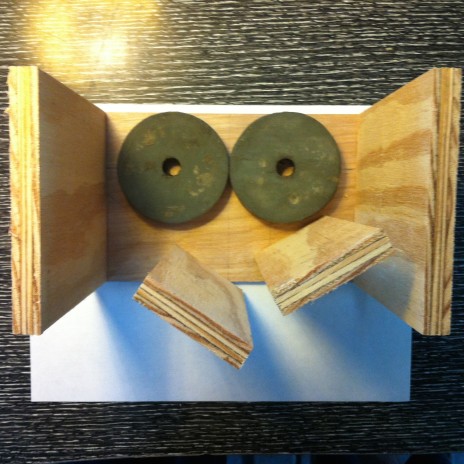
I cast the rollers using a section of 3” PVC. I sliced the PVC carefully using a coping saw, I did this because I don’t have a bandsaw and the table saw would have taken away far too much material. I made the rollers 6” long. I cut the end caps for the mold using a compass and the jigsaw. I found that a 3 1/4” hole saw would cut it really exact but I wasn’t going to spend the money for it—I doubt I’d use that size ever again. I made a concrete mixture using topping mix and PVA as additional hardener. The form was sprayed using cooking spray. I attached a hose clamp in the middle of the shaft after I inserted it into the form, this gives the concrete something to grip so the shaft doesn’t spin freely under tension. The concrete was mixed to a wet biscuit-like consistency and added. I used a 1/4” dowel to ram the concrete and to make sure there were no air bubbles. Once the form was almost full I added the other end cap and lightly tamped it down with a rubber mallet. I used three 4” hose clamps to compress the PVC form. I tightened them as I filled up the form with concrete. I wiped off and excess and let it set up over night.
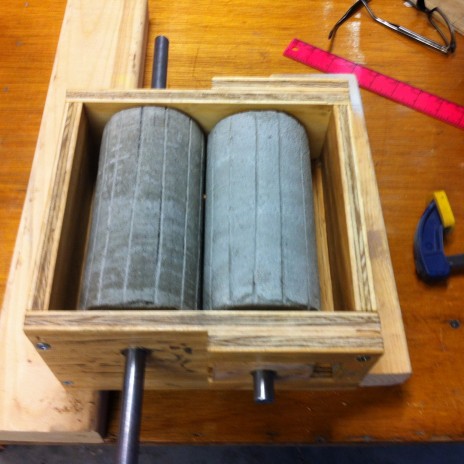
The next day I loosened the clamps and removed the forms. I did this four times, in other words I had enough shaft material to make four rollers. I got better as I went, I’d recommend not getting attached to your casts, they will not be perfect. Once they were out of the forms I did have to “true” them a little bit. I made a back up mill enclosure out of scrap plywood but slotted the holes so I could just drop the rollers into the box. I screwed a piece of 1/2” plywood across the top and used my Sureform* (a drywall tool made by Stanley Tools found at the Orange Place) to “true” the high spots. I then used the angle grinder to score horizontal lines into the concrete to give the roller some bite—I only did the roller that will act as the drive roller. Once these guys sat up again over night I assembled the boxes. After a few tests I found the setting that gave me the best crush. Currently I am using a piece of scrap pine as the handle to turn the mill, one of these days I’ll get around to making a nice one.
Thanks for sharing! I will try make one myself, maybe with some modification, that two rollers will be aligned on a plane of slope, and a feeding chute attached to the opening. That the gravity will help bring the roller together. Hope the modification can make me some grit, or flour.
I have the luxury of having a machinist as a close friend
I think the rollers could be hard faced and run out on his CDC machine or lathe